¿Cómo usar Raylib con Zig?
En este tutorial, te guiaré paso a paso para instalar y configurar Raylib sin utilizar librerías de bindings, permitiéndote tener un mayor control sobre tu entorno de desarrollo.
Ya hay algunas librerías que hacen esto muy sencillo como raylib-zig pero acá nos vamos a enfocar en aprender cómo hacer este proceso tu mismo(a) y con una configuración en tu build.zig un poco mas simplificada.
Creando el proyecto
Primero que nada vamos a crear nuestro proyecto.
# inicializando el proyecto
mkdir raylib-zig
cd raylib-zig
zig init

# el output de ls deberia quedar asi:
❯ ls -la
total 20
drwxr-xr-x  3 usuario users 4096 Nov 19 20:03 .
drwxr-xr-x 22 usuario users 4096 Nov 19 19:01 ..
-rw-r--r--  1 usuario users 3829 Nov 19 20:03 build.zig
-rw-r--r--  1 usuario users 3369 Nov 19 20:03 build.zig.zon
drwxr-xr-x  2 usuario users 4096 Nov 19 20:03 src
Ahora vamos a quitar los tests de nuestro build.zig ya que no son necesarios. Eliminaremos las siguiendes lineas.
    //más código arriba...

    // This creates a build step. It will be visible in the `zig build --help` menu,
    // and can be selected like this: `zig build run`
    // This will evaluate the `run` step rather than the default, which is "install".
    const run_step = b.step("run", "Run the app");
    run_step.dependOn(&run_cmd.step);

    //ELIMINA ESTO --------------------------------------------------------------------------->

    // Creates a step for unit testing. This only builds the test executable
    // but does not run it.
    const lib_unit_tests = b.addTest(.{
        .root_source_file = b.path("src/root.zig"),
        .target = target,
        .optimize = optimize,
    });

    const run_lib_unit_tests = b.addRunArtifact(lib_unit_tests);

    const exe_unit_tests = b.addTest(.{
        .root_source_file = b.path("src/main.zig"),
        .target = target,
        .optimize = optimize,
    });

    const run_exe_unit_tests = b.addRunArtifact(exe_unit_tests);

    // Similar to creating the run step earlier, this exposes a `test` step to
    // the `zig build --help` menu, providing a way for the user to request
    // running the unit tests.
    const test_step = b.step("test", "Run unit tests");
    test_step.dependOn(&run_lib_unit_tests.step);
    test_step.dependOn(&run_exe_unit_tests.step);

    //<--------------------------------------------------------------------------- ELIMINA ESTO
}
Con la estructura de nuestro proyecto lista ahora pasamos a ver cómo usar Raylib.
Instalando Raylib
Ahora nos vamos al repositorio de Raylib y vamos a la página de releases para copiar el link de descarga del código fuente en formato tar.gz. Una vez copiado vamos a ejecutar el siguiente comando:
# puedes intercambiar el link con el que hayas copiado tu
zig fetch --save https://github.com/raysan5/raylib/archive/refs/tags/5.5.tar.gz
Asegurate de que tu build.zig.zon tenga algunas lineas parecidas a esta debajo de la propiedad .dependencies:
.raylib = .{
    .url = "https://github.com/raysan5/raylib/archive/refs/tags/5.5.tar.gz",
},
Probablemente verás un error parecido a este:
tu-proyecto/build.zig.zon:29:20: error: dependency is missing hash field
            .url = "https://github.com/raysan5/raylib/archive/refs/tags/5.5.tar.gz",
                   ^~~~~~~~~~~~~~~~~~~~~~~~~~~~~~~~~~~~~~~~~~~~~~~~~~~~~~~~~~~~~~~~
note: expected .hash = "1220d93782859726c2c46a05450615b7edfc82b7319daac50cbc7c3345d660b022d7",
En ese caso solo tendrías que copiar ese hash y pegarlo debajo de la propiedad .url, se vería de esta manera:
.raylib = .{
    .url = "https://github.com/raysan5/raylib/archive/refs/tags/5.5.tar.gz",
    .hash = "1220d93782859726c2c46a05450615b7edfc82b7319daac50cbc7c3345d660b022d7",
},
Luego de eso simplemente ejecutamos otra vez zig build --fetch para asegurarnos de que nada haya ningún error o problema y si no hay error, pasamos modificar nuestro build.zig.
Configurando el build.zig
Ahora pasamos a modificar nuestro build.zig para que compile Raylib y podamos usar sus header files. Pero primero que nada hay que agregar Raylib como dependencia, así que agregamos las siguientes líneas:
pub fn build(b: *std.Build) void {
    const target = b.standardTargetOptions(.{});
    const optimize = b.standardOptimizeOption(.{});

    const lib = b.addStaticLibrary(.{
        .name = "raylib-zig",
        .root_source_file = b.path("src/root.zig"),
        .target = target,
        .optimize = optimize,
    });

	//Debajo de la declaracion de la constante "lib"
	//Creamos la dependencia de Raylib
    const raylib = b.dependency("raylib", .{ .target = target, .optimize = optimize });
    lib.addIncludePath(raylib.path("src"));


    //más código abajo...
Ya con eso estamos habilitando los header files de raylib, que luego vamos a poder importar desde nuestro main.zig. El próximo paso es enlazar nuestra dependencia al ejecutable del proyecto:
    //más código arriba...

    const exe = b.addExecutable(.{
        .name = "raylib-zig",
        .root_source_file = b.path("src/main.zig"),
        .target = target,
        .optimize = optimize,
    });

	//Intalamos los headers de Raylib and nuestro ejecutable
    exe.installLibraryHeaders(raylib.artifact("raylib"));

	//Y enlazamos Raylib al ejecutable
    exe.linkLibrary(raylib.artifact("raylib"));

    //más código abajo...
Y como paso final necesitamos enlazar librerias del sistema para que las funcionalidades de Raylib, pues… funcionen:
    //más código arriba...

	//Asegurate de que cada paquete este instalado en tu equipo sistema operativo (linux)
    exe.linkSystemLibrary("GL");
    exe.linkSystemLibrary("rt");
    exe.linkSystemLibrary("dl");
    exe.linkSystemLibrary("m");
    exe.linkSystemLibrary("X11");

    b.installArtifact(exe);
    const run_cmd = b.addRunArtifact(exe);
    run_cmd.step.dependOn(b.getInstallStep());

    if (b.args) |args| {
        run_cmd.addArgs(args);
    }
    const run_step = b.step("run", "Run the app");
    run_step.dependOn(&run_cmd.step);
}
Ahora sí, ya tenemos todo listo para testear Raylib en nuestro proyecto y ver si funciona o no.
Testeando Raylib
¡Ya casi terminamos! Vamos a modificar nuestro main.zig para importar Raylib y renderizar una ventana sencilla. Asegurúte de que tu mai.zig se vea de la siguiente manera:
//main.zig
const std = @import("std");
const ray = @cImport({
    @cInclude("raylib.h");
});

pub fn main() !void {
    std.debug.print("main function working", .{});

    const screenWidth = 800;
    const screenHeight = 450;

    ray.InitWindow(screenWidth, screenHeight, "raylib [core] example - basic window");

    ray.SetTargetFPS(60);
    while (!ray.WindowShouldClose()){

        ray.BeginDrawing();
        ray.ClearBackground(ray.RAYWHITE);
        ray.DrawText("Congrats! You created your first window!", 190, 200, 20, ray.LIGHTGRAY);
        ray.EndDrawing();

    }

    ray.CloseWindow();
}
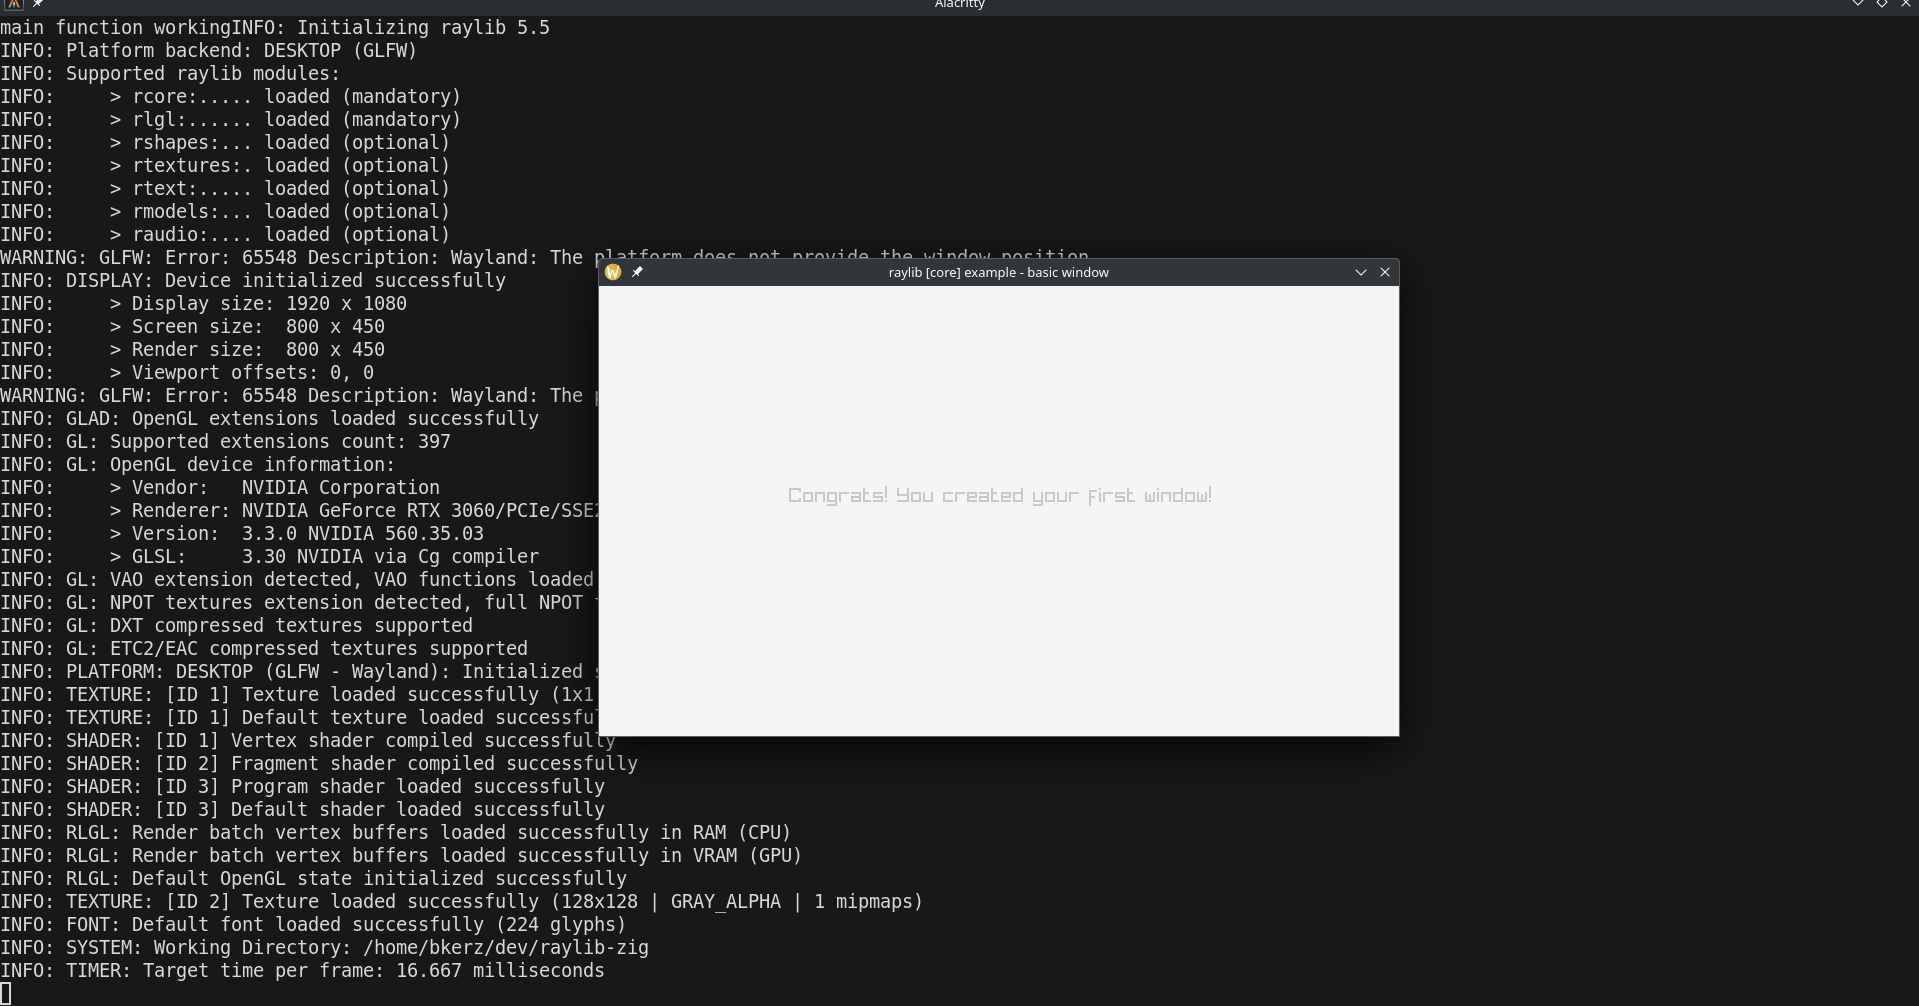
Ok ya es hora de compilar y ejecutar nuestro proyecto con el comando zig build run, y si todo va bien, deberiamos ver una ventana parecida a la siguiente:

¡Y listo! Ya con esto estás listo(a) para continuar usando Raylib con Zig.